Secure Your Website Now: How To Mitigate DDoS Attacks with CloudFlare’s Free Plan

Cloudflare is a powerful tool that can help protect your website from malicious attacks, cyber threats, and other online security issues. With Cloudflare, you can easily set up a secure environment for your website and keep it safe from potential threats. In this guide, we’ll discuss how to use Cloudflare for protecting your site for free, step-by-step.
So, let’s get started!
Prerequisites
You should have a Cloudflare account. Register here if you have none yet!
You should have a registered and active Domain.
Steps
Login to your Cloudflare account.
At the upper right section, press the Add Site.

Enter your site, and press the Add Site button:

You can choose any plan you want, but for this guide we will use the Free plan.

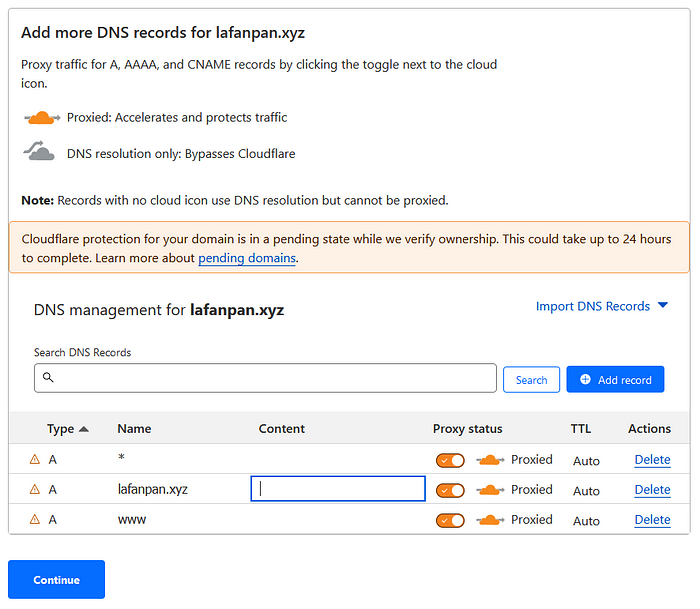
Next, get your own remote server’s public IP Address; however, if you are using a web hosting service, you can leave the fields as is.
Paste your remote server’s IP on each Content fields of Type A. In the case below, there are three rows for updating.

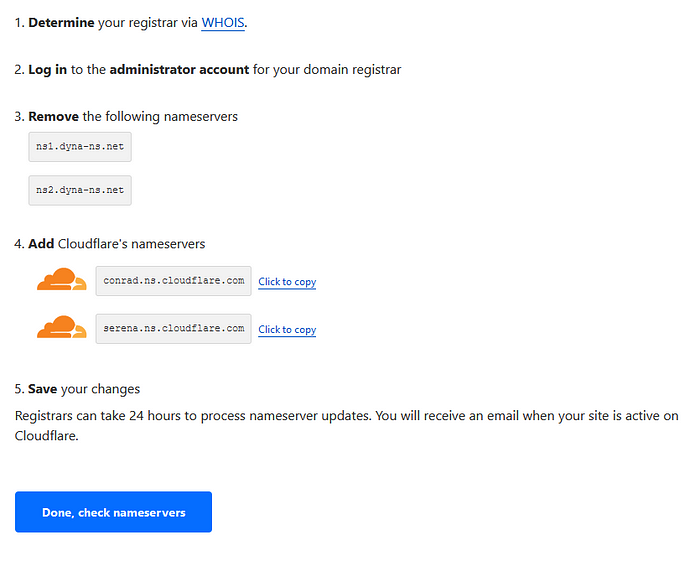
Press continue, and you will be redirected to the succeeding steps on changing your Nameservers.
In my case, the nameservers come from Dynadot (where I registered the domain).

Once completed, press the Done, check nameservers. This will let Cloudflare check if you have modified the nameservers for your domain.
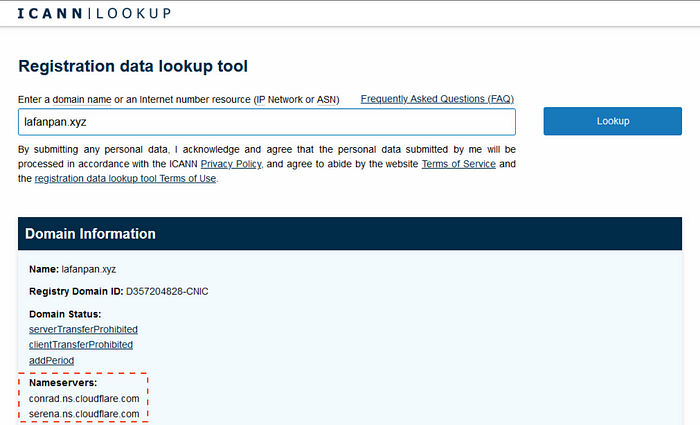
You can verify your nameservers by searching your domain here https://lookup.icann.org/en/lookup.

It will take time to fetch the updated nameservers. You can press the Check nameservers button from time to time.

Once verified, you will get a notification that your site is already protected by Cloudflare — for free!

Conclusion
In conclusion, Cloudflare is an excellent tool for protecting your website from malicious attacks and ensuring a secure environment for your visitors. It is free to use, easy to set up, and provides a variety of features to help you protect your site.
